Member Portal: Event Permit applications
How to apply for an Event Permit

Mat IT Manager
Last Update 2 years ago
Article status: Live
Date created: 10/10/2023
Last reviewed: 11/10/2023
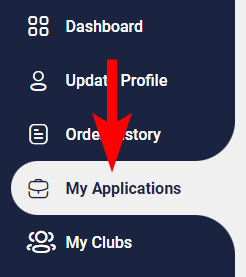
Click My Applications on the left menu.
Click Create New Applications button.

Click the Select button next to the Event Permit Applications option.

Application Details
Click the Apply button then the Create Application button.

Event Details
Enter all the relevant information as you would on the paper form.
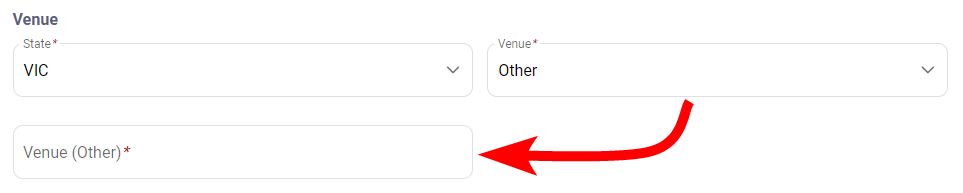
If the Venue dropdown does not contain your venue, choose Other then enter the Venue name in the text field below.
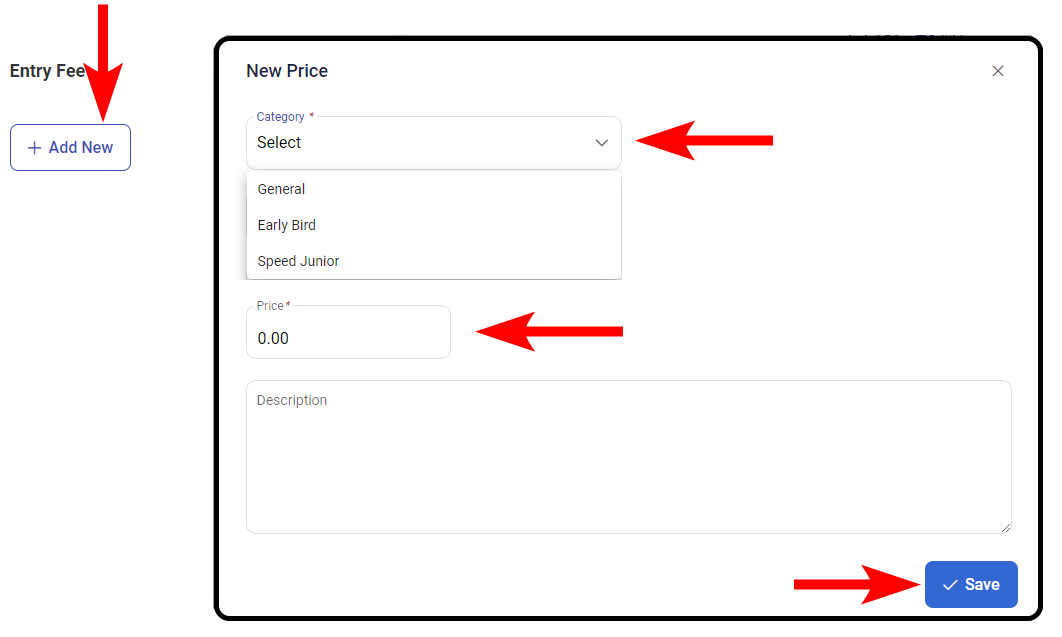
Enter the Event Fees by clicking the + Add New button in the Entry Fee section.
Choose the different Fee categories from the dropdown, Enter the Price and a description then press the Save button.
Repeat this step have additional fees.
Click the Next button
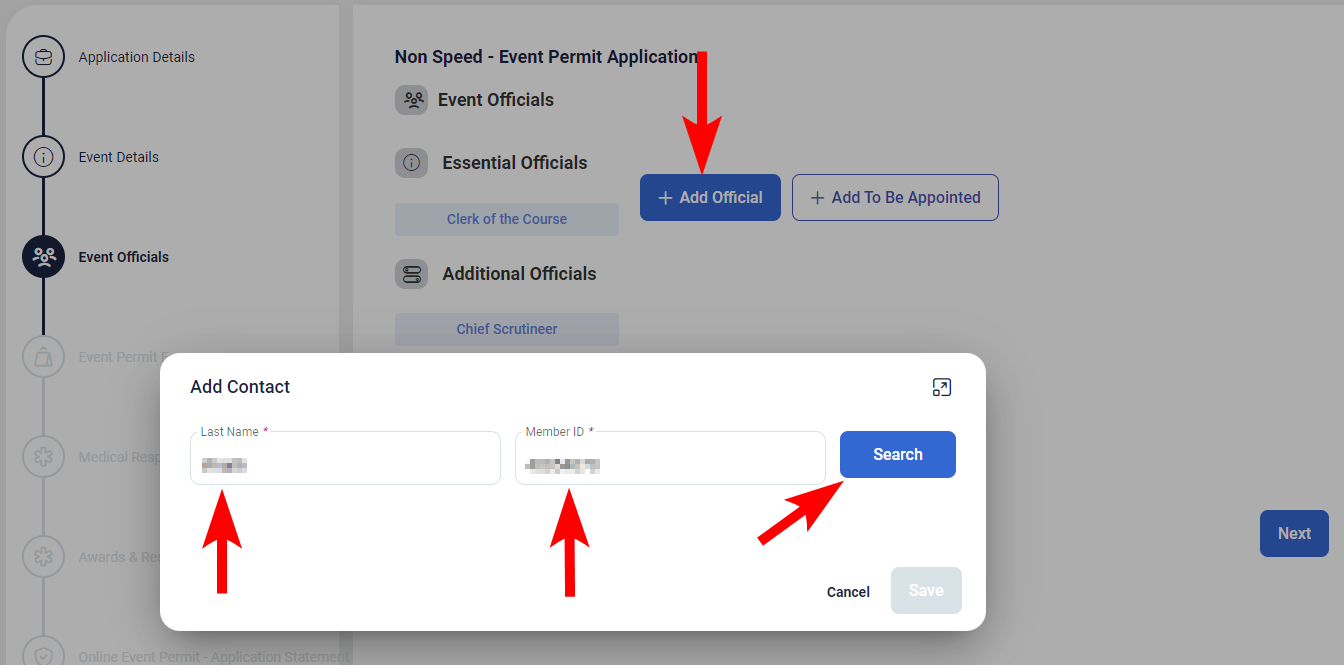
Event Officials
The Event Officials section contains Essential Officials and Additional Officials.
Adding Essentials Officials is mandatory, Click the + Add Official button.
If the official is not know at the time of the Event Permit Application then click the + Add To Be Appointed button.
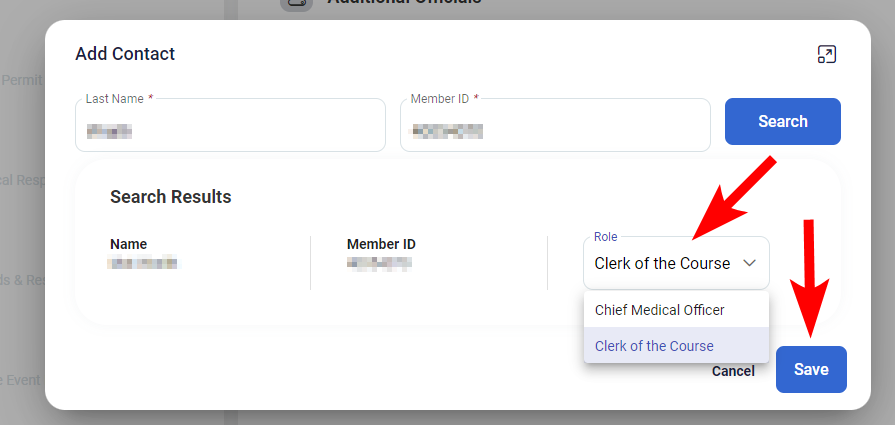
If you know the name and Member ID of the official that you wish to nominate:
Enter the Lastname and Member ID of the Official and click the Search button.
Then choose the Role from the dropdown that you wish to associate with the Official.
Click the Save button.
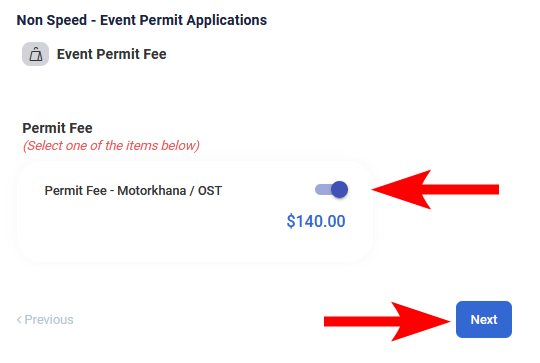
Event Permit Fee
Check the Event Permit Fee and click the Next button
Medical Response Plan
Complete your Medical response plan with all the relevant information of the appropriate medical response personel, then click the Next button
Awards & Results
Provide information on manner in which the results will be different and prizes awarded and any other event requirements, then click the Next button
Terms & Conditions
Indicate that you have read and agree to the three terms & conditions, then click the Submit button
Payment
Either fill in your Credit card information and click the Next button or click the Send Invoice button to complete the payment process.