Event Entry V2: Adding Crew to My Crew
Member and Non-Member crew

Mat IT Manager
Last Update 2 years ago
Article status: Live
Date created: 31/01/2024
Last reviewed: 31/01/2024
Introduction
Welcome to the "My Crew" section of the Motorsport Australia Event Entry app, where organizing your event team is simple and intuitive. This guide will take you through the process of adding crew members using the new invitation system.
To improve data accuracy and security, we've restricted the amount of information that can be edited for crew members. The ability to edit any personal information of crew members has been removed. This ensures that the data remains accurate and reliable.
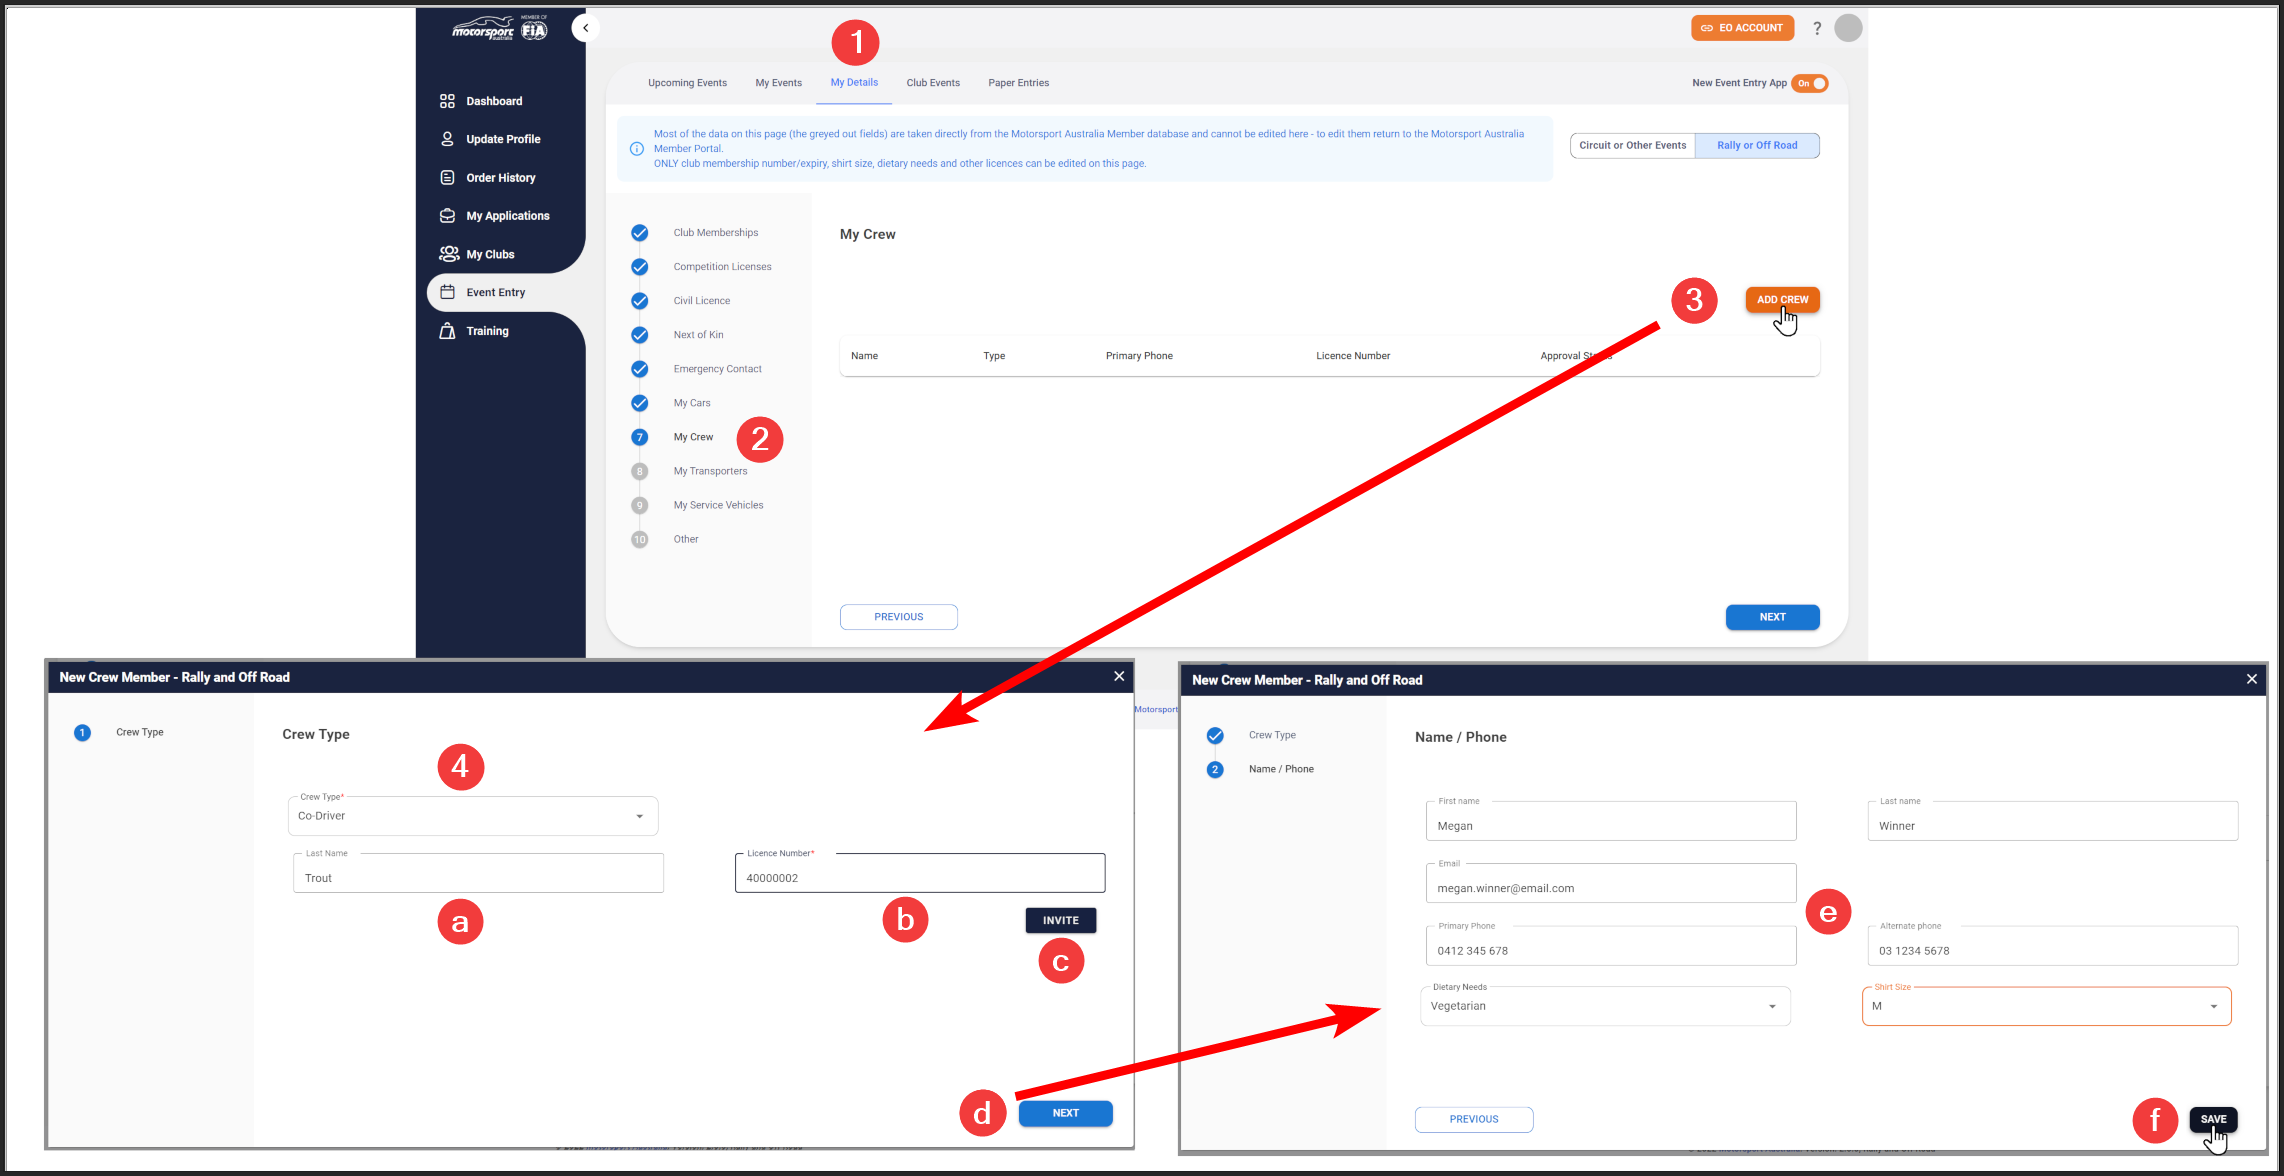
Quick guide
2. Click My Crew section
3. Click Add Crew button
4. Choose a Crew Type from the dropdown
For Member crew
a. Enter their Last name
b. Enter their Licence number
c. Click the Invite buttonFor Non-member crew
d. Click Next
e. Enter their details
f. Click Save
Detailed version
Crew types
In the Motorsport Australia Event Entry app, crew members are categorized into two distinct types: Members and Non-Members, each with its own set of titles and processes for addition to your crew list.
Member Crew Types:
- Co-Driver
- Driver
- Navigator
- Official
- Second Driver
- Third Driver
For Member Crew, the addition process is an invitation-based system. This ensures that all personal and licensure details are accurate and verified. Members will receive an invitation via email, which they must accept to be officially added to your crew list, thus maintaining the integrity of member information and compliance with privacy standards.
Non-Member Crew Types:
- Other Crew
- Pit Crew
- Race Support Company
- Service Crew
- Service Crew Chief
- Social
- Team Manager
For Non-Member Crew, the addition process is direct, allowing you to manually enter their contact information without the need for an invitation or approval process. This is designed to streamline the addition of non-member individuals who provide essential support during events but do not have a member ID within the system.
By having two separate processes, the app accommodates the different levels of information access and consent required for members versus non-members, ensuring a seamless management experience while adhering to privacy regulations and event requirements.
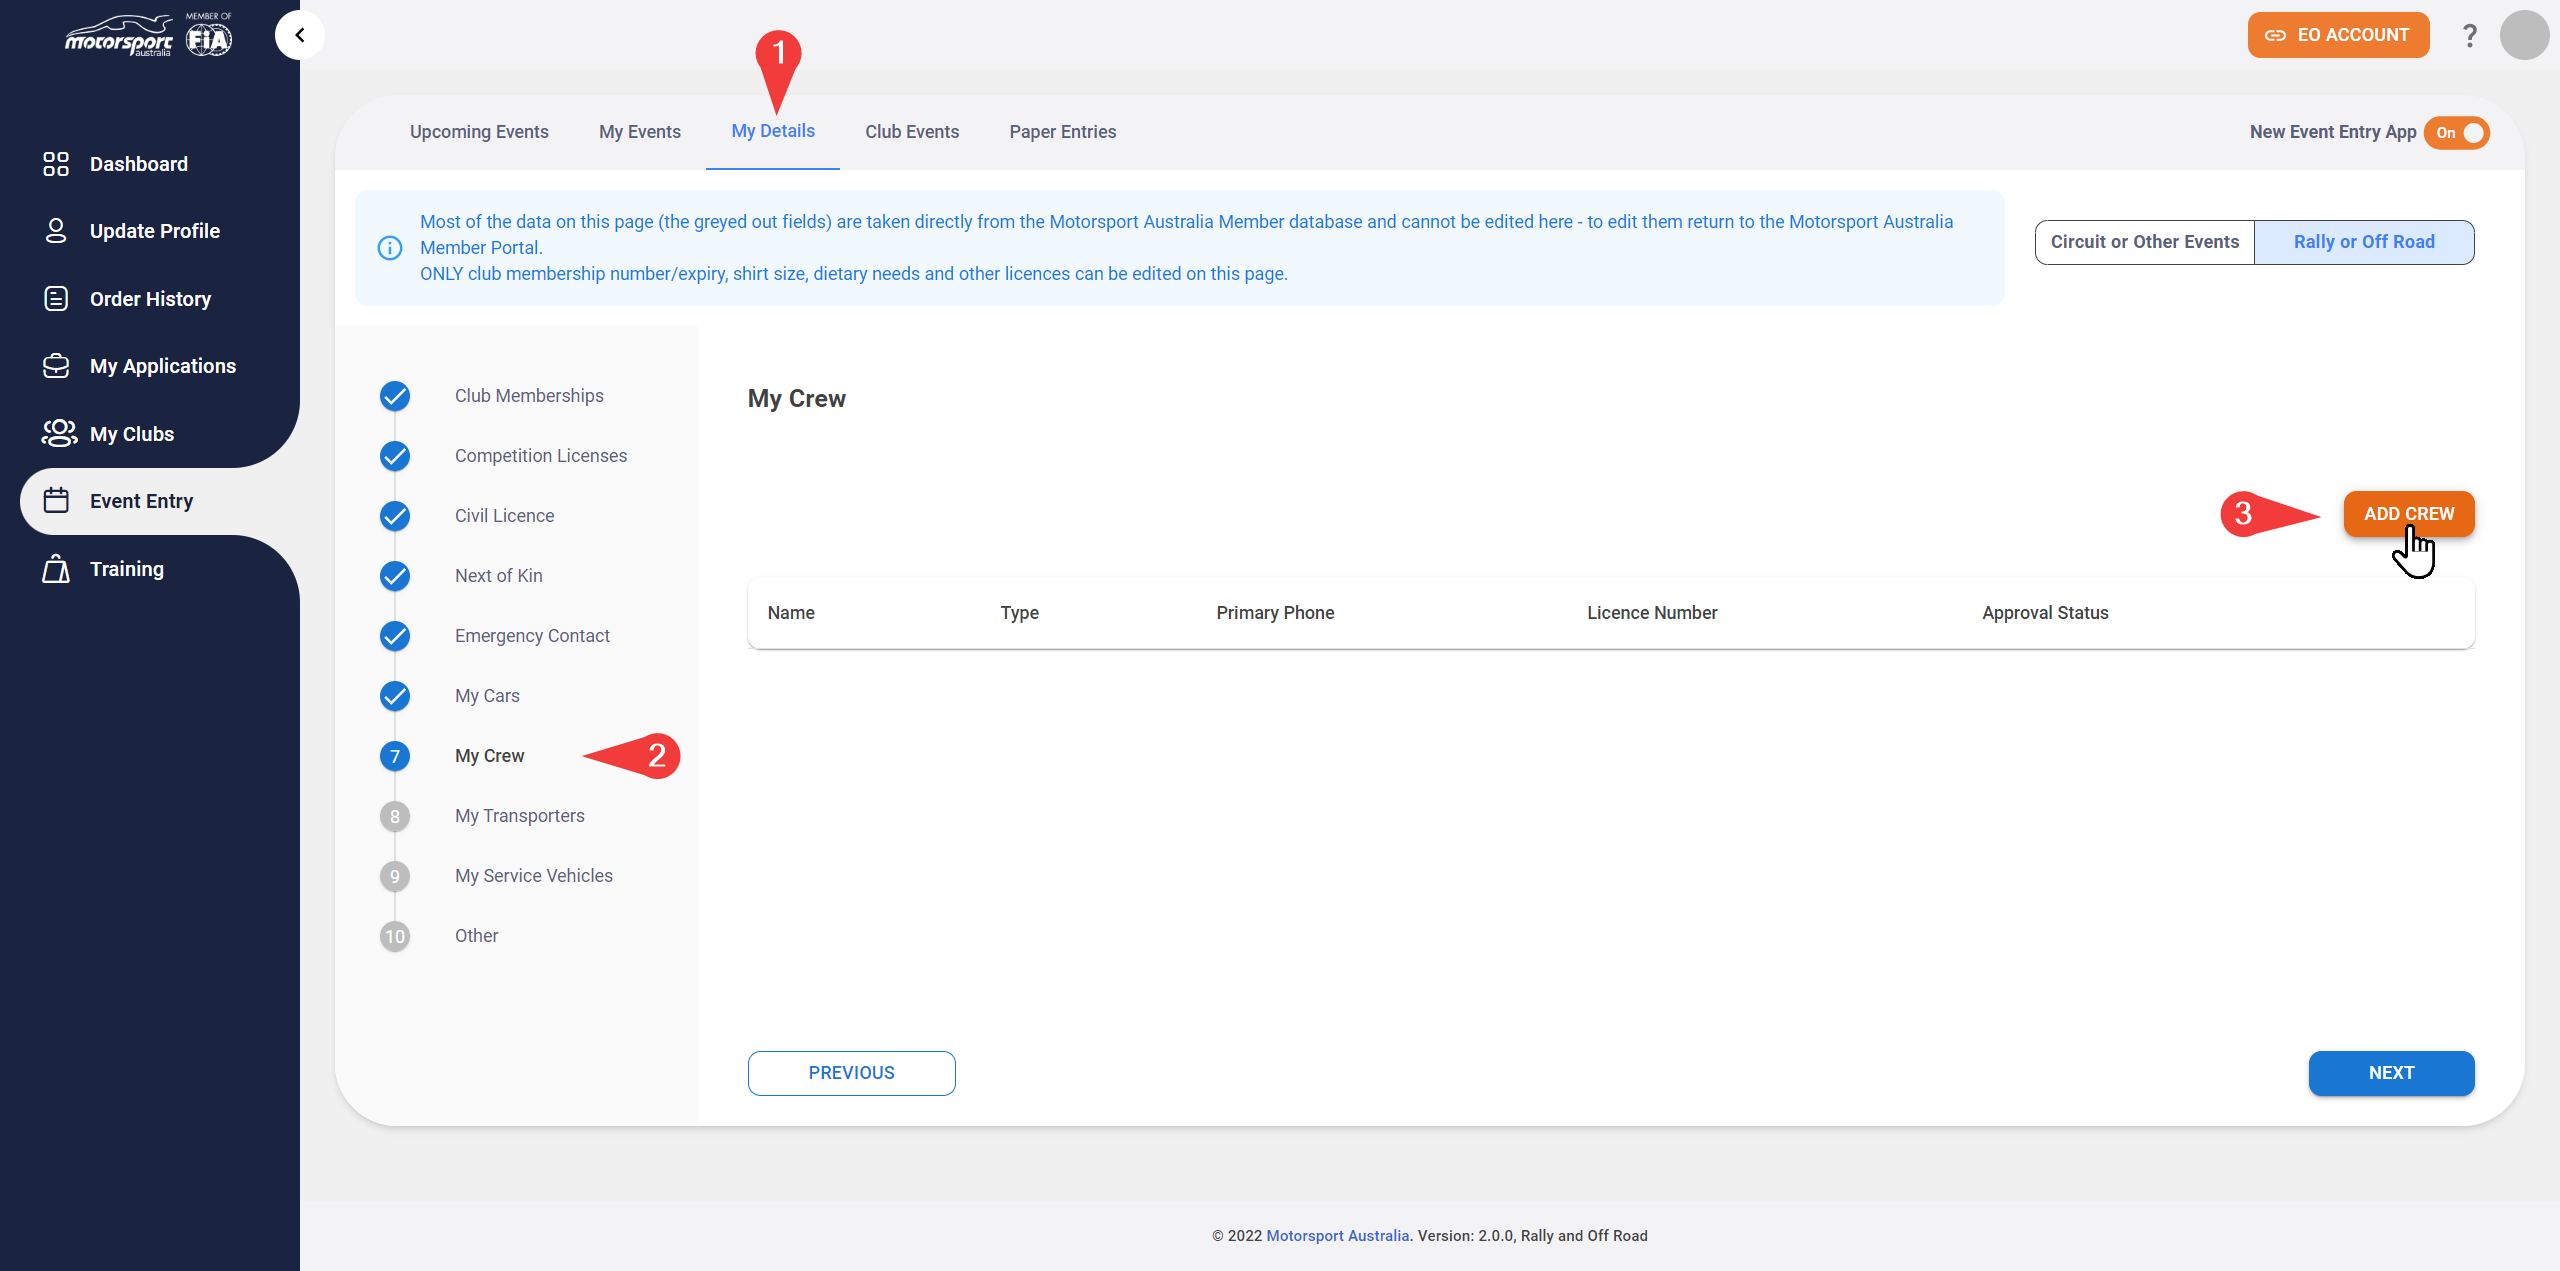
Part 1: Accessing 'My Crew'
2. Selecting 'My Crew': On the left-hand side menu, click on 'Event Entry' to expand your options and then select 'My Crew'—typically indicated by number seven—to manage individuals associated with your events.
3. Adding a New Crew Member: To add a new crew member to your team, click on the red 'ADD CREW' button on the top right corner of the 'My Crew' section.
Part 2: Adding Member or Non-Member crew
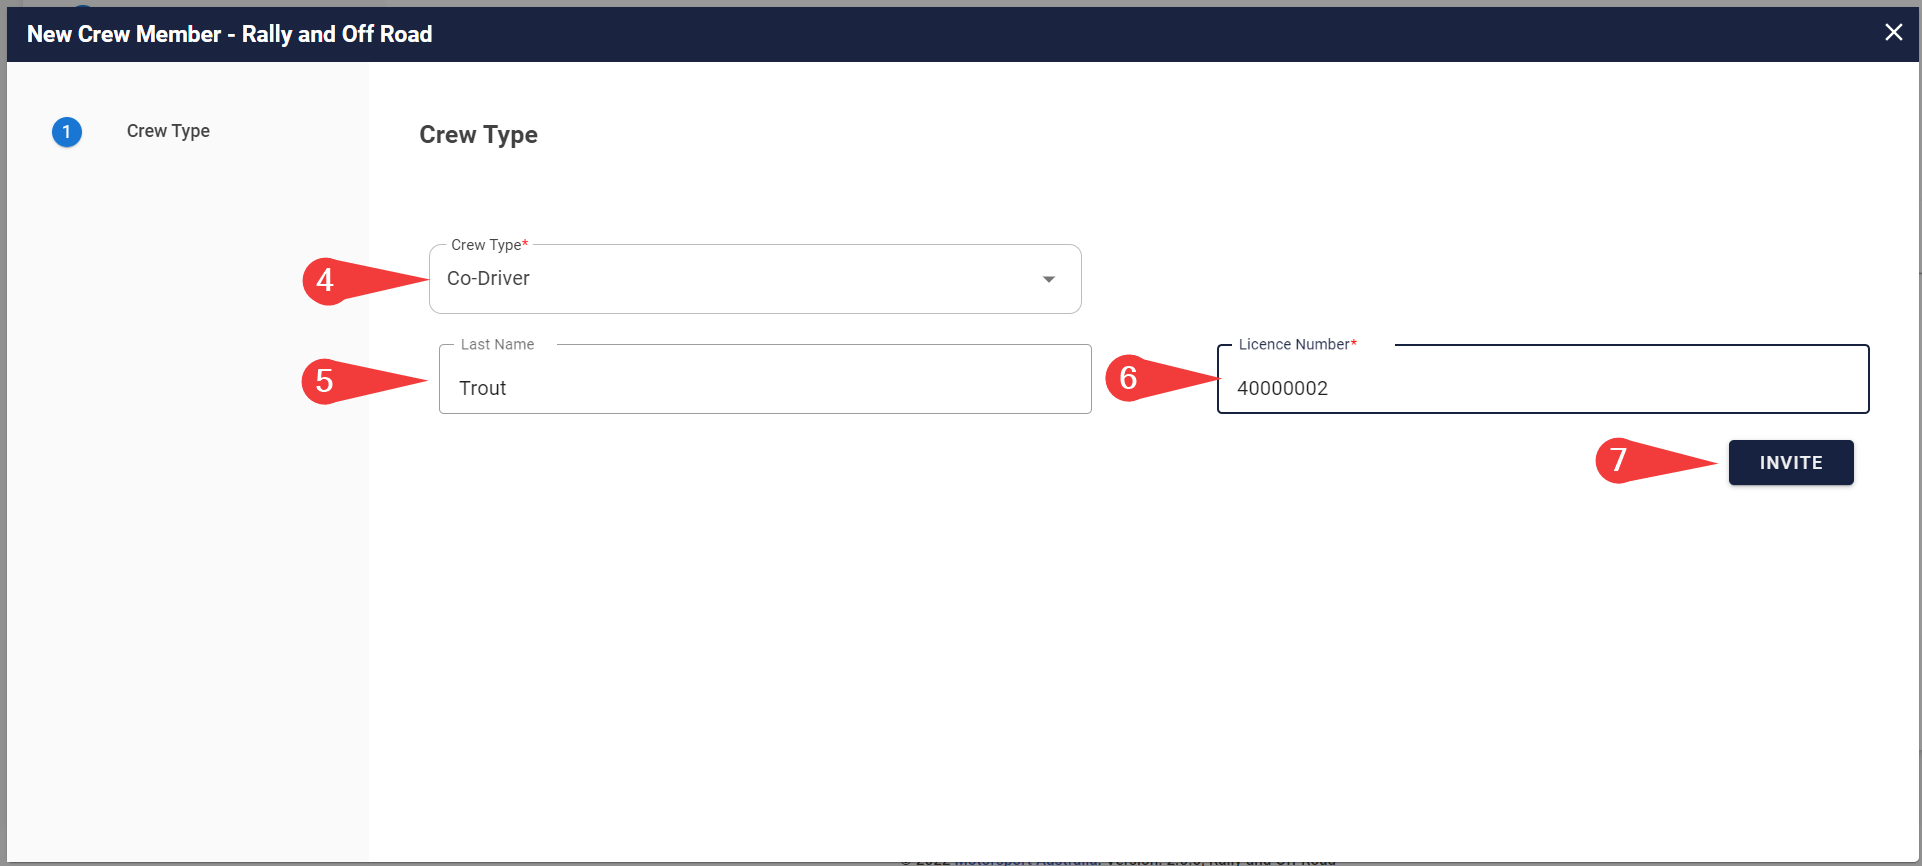
Part 2a: Inputting Member Crew Details
5. Entering Last Name: Input the last name of the crew member you are inviting. It's important for this information to match their official documents for verification purposes.
6. Providing Licence Number: Enter the crew member's licence number. This unique identifier is crucial for ensuring the individual is eligible and properly registered for the event.
7. Sending the Invitation: Once all the required fields are filled out, click the 'INVITE' button to send an invitation to the crew member.
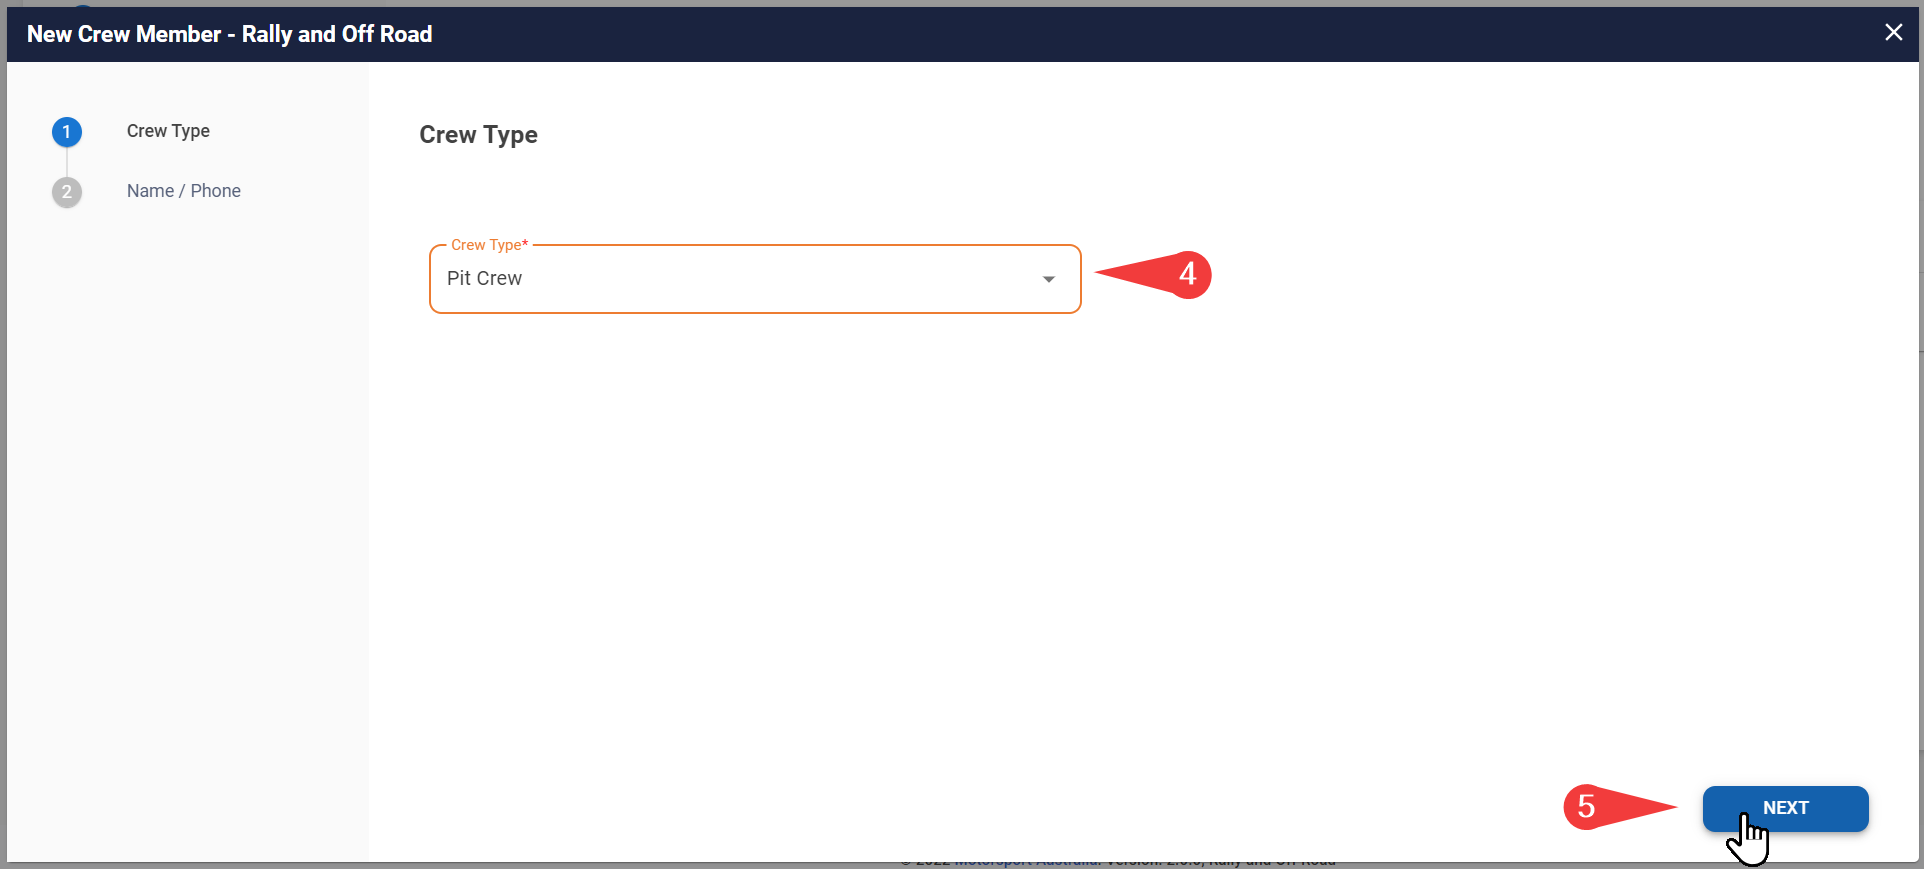
Part 2a: Inputting Non-Member Crew Details
When adding non-member crew to your team, the process is simplified to ensure you can quickly include all the necessary support personnel for your events.
4. Crew Type Selection: For non-member crew, select the appropriate crew type from the dropdown menu, such as 'Pit Crew'. This classification helps in organizing your team based on their roles.
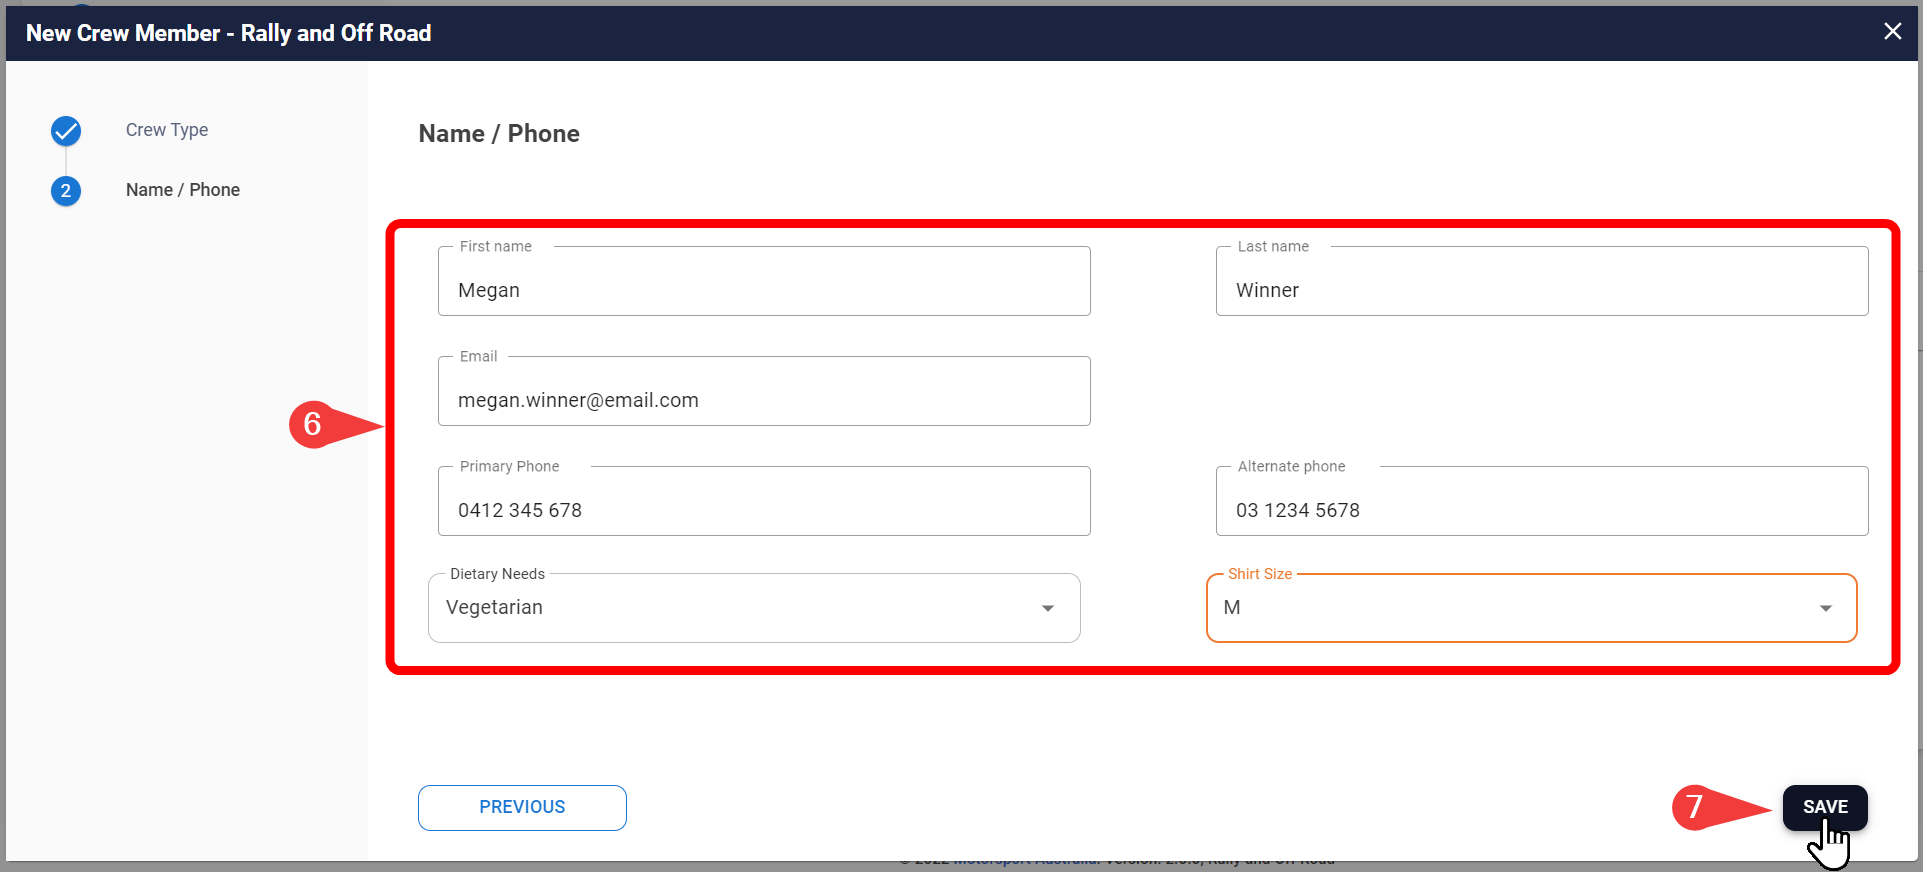
5. Proceed to Name/Phone Section: After selecting the crew type, click 'NEXT' to move to the section where you can enter the name and contact details of the non-member crew.
6. Filling Out Contact Details: Enter the non-member's first and last names, email, and primary phone number. These details are essential for communication and coordination during the event.
Additional Information: If applicable, provide any additional information that may be relevant, such as dietary needs or shirt size. This helps ensure that all crew members' preferences and requirements are taken into account.
7. Saving the Details: Once all information is entered, click 'SAVE' to add the non-member crew to your team list.
Part 3: Confirmation and Awaiting Approval
(Member crew only)
The Member crew will receive an invitation that they will need to approve before you can enter them into any event.
Approval Status: The 'My Crew' table will now display the invited crew member along with their 'Approval Status'. It's important to note that a crew member's licence number may show as expired, and they will need to renew it to participate in the event.
Awaiting Member's Acceptance: The system will inform you that the crew member has not yet accepted your invitation. You will have the option to resend the invitation if necessary.
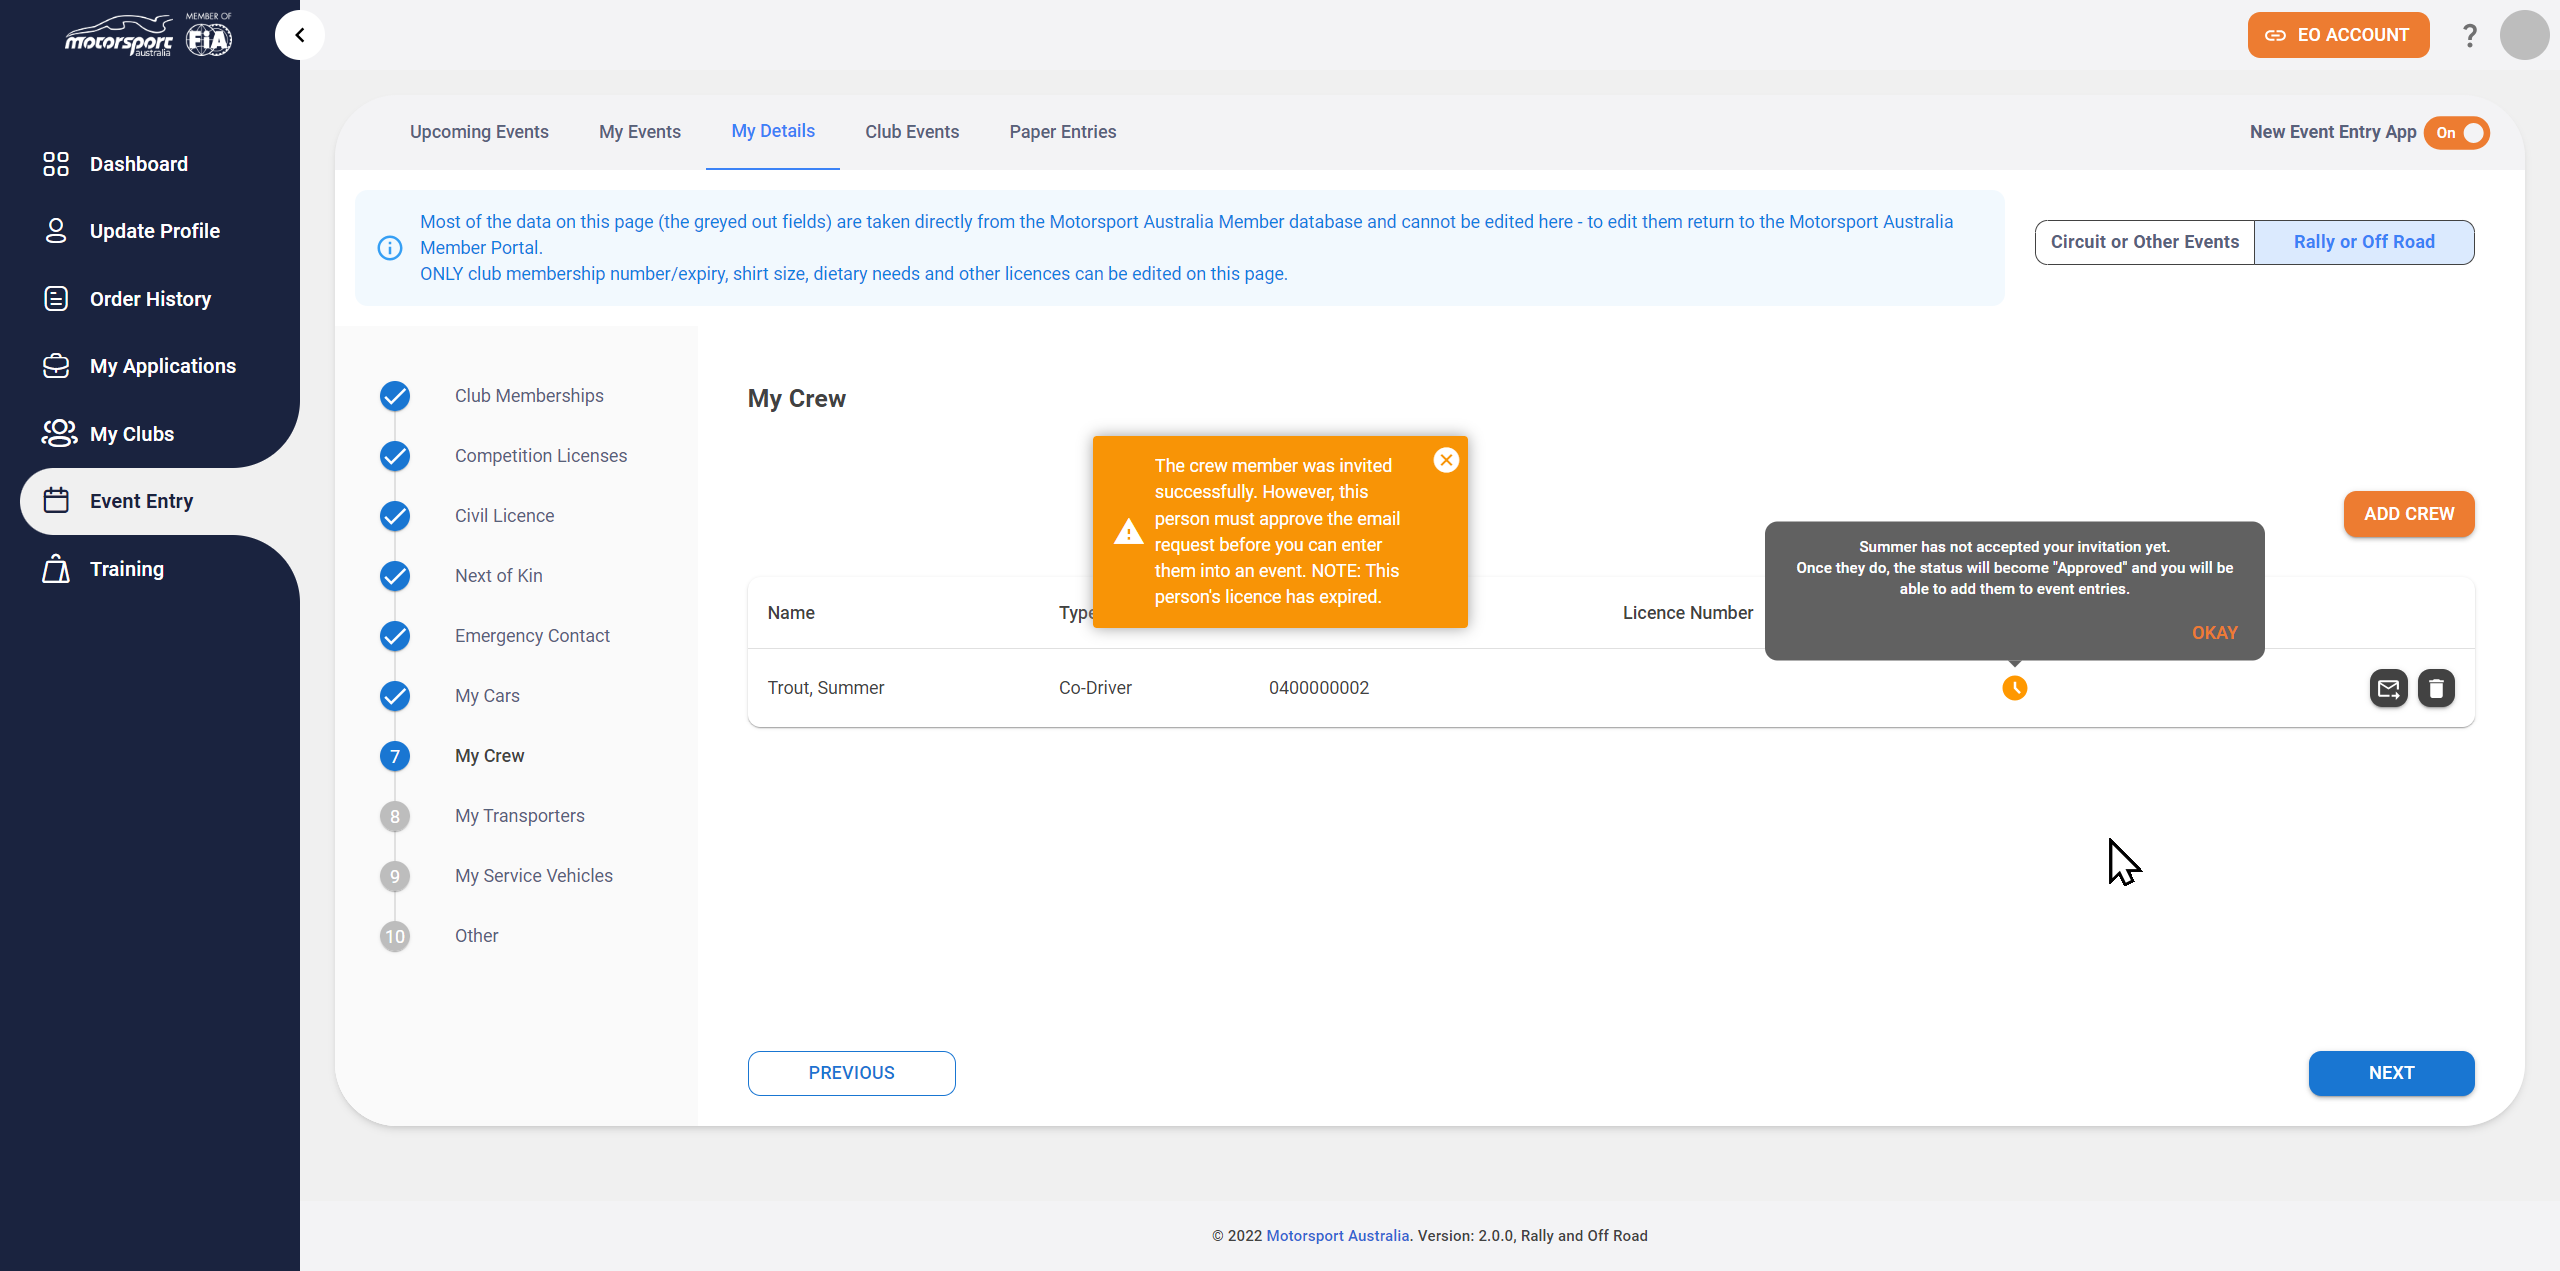
Remember, crew members can only be added to your event entries once they have accepted your invitation. This new system ensures that both you and your crew have a clear understanding and record of participation in events.